
What it is
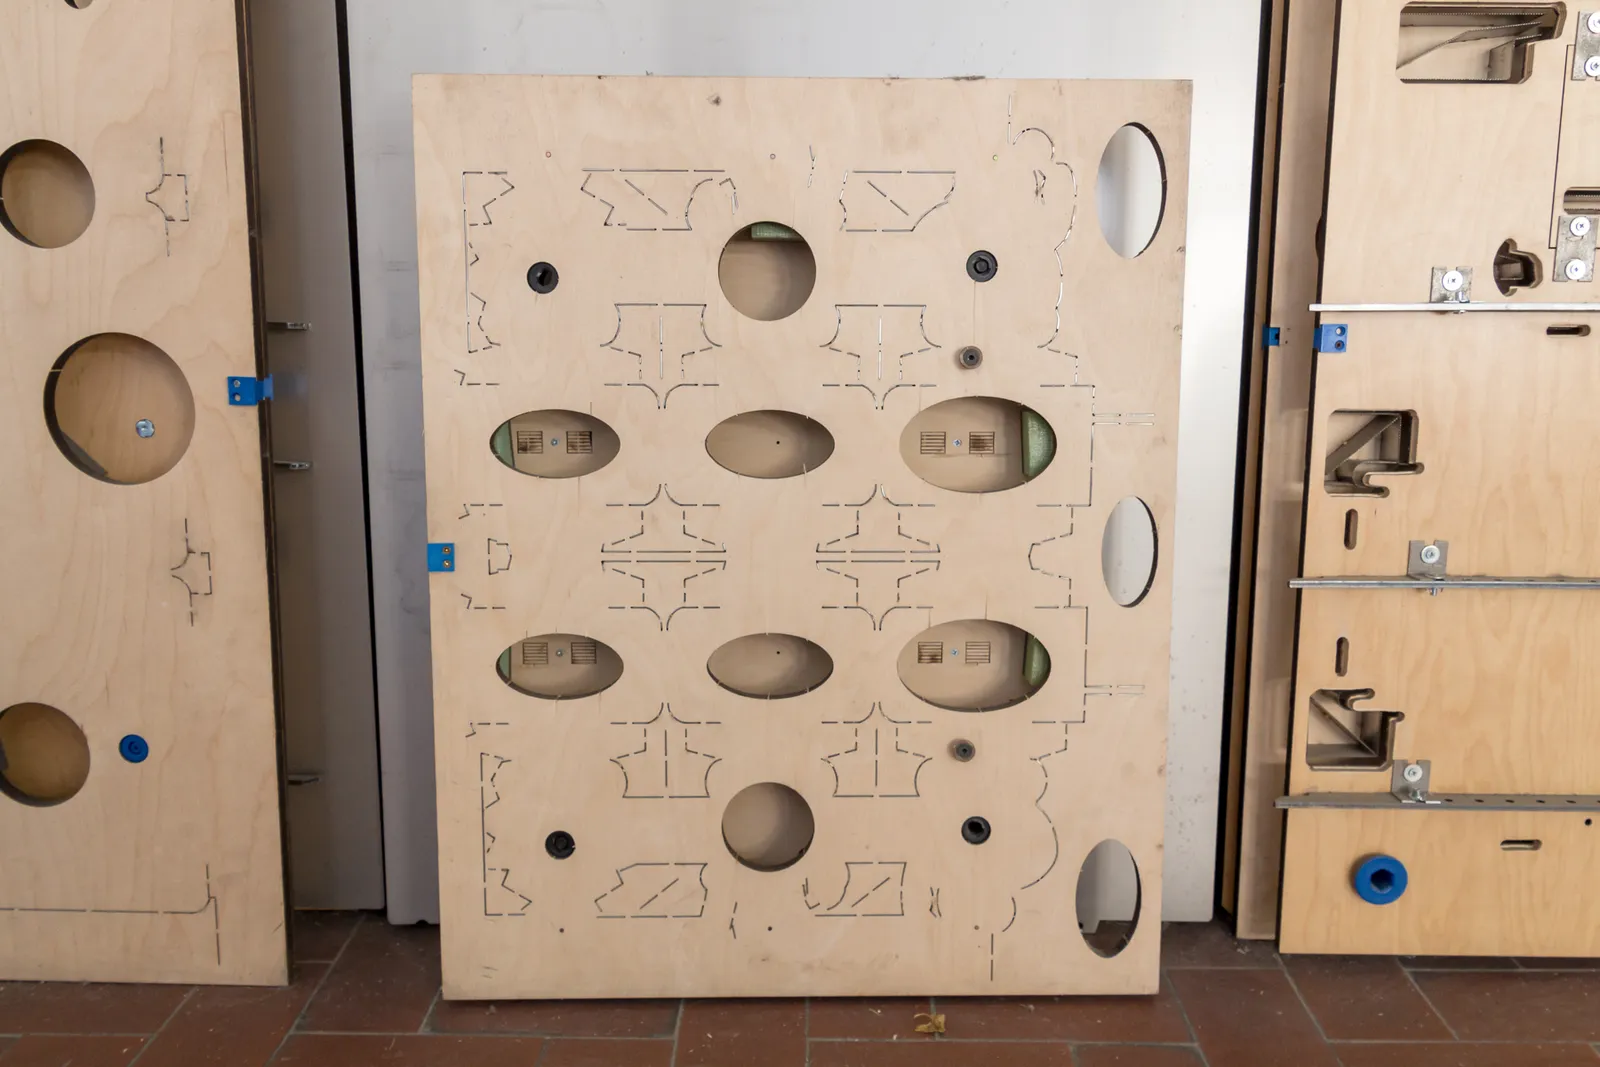
The cutting die is the tool that turns a flat sheet into a shape. It starts from a plywood board laser-cut along the die-line of the design: steel cutting rules are driven into the slots produced, where the material has to be cut, and creasing rules where it only has to fold. The creasing rules are lower than the cutting rules, so they never reach far enough to cut. Ejection rubbers are glued around them and release the sheet from the tool at the end of the stroke. On the machine the die presses the sheet against a counter plate on which, in line with every creasing rule, a matrix with a groove is fitted.
That is exactly where the difference between the two operations lies. The cutting rule cuts. The creasing rule instead pushes the board down into the groove of the matrix: the fibres compress on one side and stretch on the other, and the result is a hinge, a zone weakened in a controlled way along which the board folds without breaking. The width of the groove and the height of the creasing rule are chosen according to the thickness and the type of substrate, and it is that choice which decides whether the fold will be clean or laboured. After the stroke the sheet is stripped, that is, freed of its trim waste, and stacked in bundles. Before reaching this point the shape is always tested on a prototype: here the physical and digital mock-up is ready in twenty-four hours, and it exists precisely to check the cutting die before it is built.
How to prepare the file
- The die-line is supplied as vector artwork, on a separate layer, with distinct spot colours named for each function: cut, crease, reverse crease, perforation, glue area.
- That layer must not print: it is set to overprint and must not generate a separation. It travels with the file, it is not merged into the artwork.
- Bleed beyond the cutting line is allowed for on every side, along with a safety margin for text, logos and rules with respect to cuts and creases. The values depend on the material and on the equipment, so they are to be agreed at prepress stage.
- If the cutting die already exists, the artwork is built on that die-line without altering or rescaling it: any adjustment to the die-line means a new cutting die.
- The required grain direction and the glue side are indicated, and the glue side is kept free of varnish, film and foil.
What can go wrong
- The register between print and cutting die always has a tolerance. Narrow frames, rules running parallel to the cut and backgrounds that end exactly on the edge highlight any deviation: it is better to design forgiving edges, or a background that runs into the bleed.
- Board cracks on the crease when the grain direction is wrong, when the substrate is very stiff or when the fold crosses a dark solid. A fold parallel to the grain direction is always the cleanest: it is a constraint to bear in mind as early as the imposition, not one to discover at the folder-gluer.
- The gluing areas must stay bare. Varnish, lamination or foil on the flap means a carton that does not hold, and there is no way of putting it right downstream.
Frequently asked questions
- Is a new cutting die always necessary?
- Only if the shape changes. If the project reuses an outline that already exists, the artwork is built on the die-line of that cutting die and no new tool is made. Even a small change in dimensions, though, is a new cutting die: the die-line is not rescaled.
- Why does the board crack on the fold?
- Almost always for three reasons that add up: the fold crosses the grain instead of following it, the crease is not proportioned to the thickness of the substrate, or there is a dark solid or a stiff film on top that does not follow the deformation. It is solved in the imposition and in the choice of matrix, before production.
- What is the difference between a crease and a perforation?
- A crease does not cut: it compresses the board so that it folds and stays intact. A perforation is an interrupted cut, made to break when the user pulls. The first is there to build the carton, the second to open it.